Learning Handwriting using Handwriting Without Tears
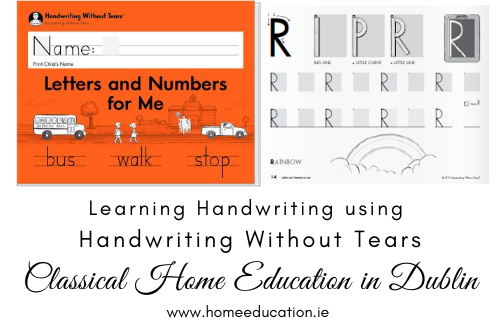
Both my children loved learning to write using the Handwriting Without Tears curriculum. I think this is a fantastic curriculum for learning print handwriting, and it is available here in Ireland from Sensational Kids in Naas and Thinking Toys in Co. Clare.
The aim of the program is for children to learn to write legibly and quickly. It is used by many home educators right from the start, and it is also used remedially with older children both by parents and by occupational therapists.
With home educating we have the significant advantage of being able to teach at our child’s pace and to teach for mastery.
Some curricula tie reading and writing together. As is usual in education, there are differing opinions. I think it is better to separate these very different skills.
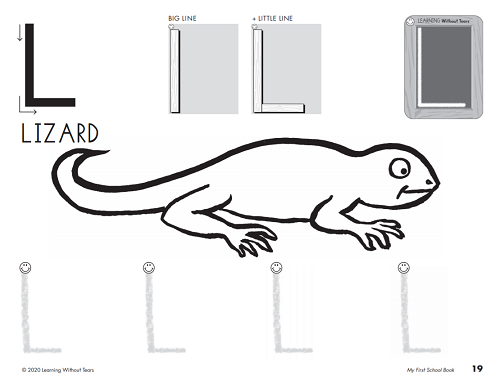
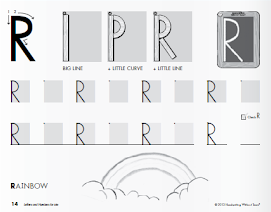
The Handwriting Without Tears program starts with learning all the capital letters first, as they are easier to write and recognise; for example, they are all the same height.
It is a very fun, multi-sensory experience. There is a CD of songs, so your child is singing and having fun while learning. For example, singing about learning to start her capital letters at the top, while pointing up, or finding the top, middle and bottom of her body with a song before writing the letter E. The child is introduced to the wooden pieces before starting to create the letters. Another song encourages them to find the small curve, large curve, etc, and then tap them together or hold them above their head.
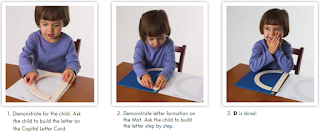
The process for learning to write a letter with Handwriting Without Tears
Here are the steps for learning to make a letter. Of course, you are not doing all those steps in one day. That is just the process.
Take the little blue mat and make the letter using the wooden pieces, of which there are four types – small and large lines, small and large curves. Having made the letter your child would trace the wooden letter with their finger. The tracing is similar to the Montessori sandpaper letters, which you could add in if you have them.
Have your child makes the letter using playdough. This is optional but fun, and good for their motor skills.
Next, use a little chalkboard. The chalkboard and the blue mat have a little smiley face in the top left, where most letters start, and the chalkboard uses the idea of “Wet, Dry, Try”. Mom or Dad writes the letter correctly with the chalk, then the child, using a little sponge, wipes away mom/dad’s letter – while actually “writing” the letter without realising! Then the child writes the letter with chalk, following the wet lines.
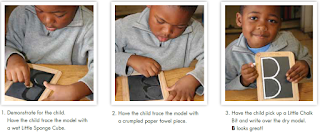
Next, your child uses little crayons to follow the large grey letters in the first workbook, colouring in a picture to go with the letter if desired.
In the final step, your child is writing a lovely capital letter using their pencil in their notebook.
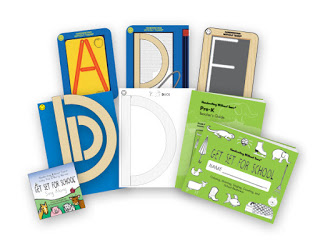
What do you need?
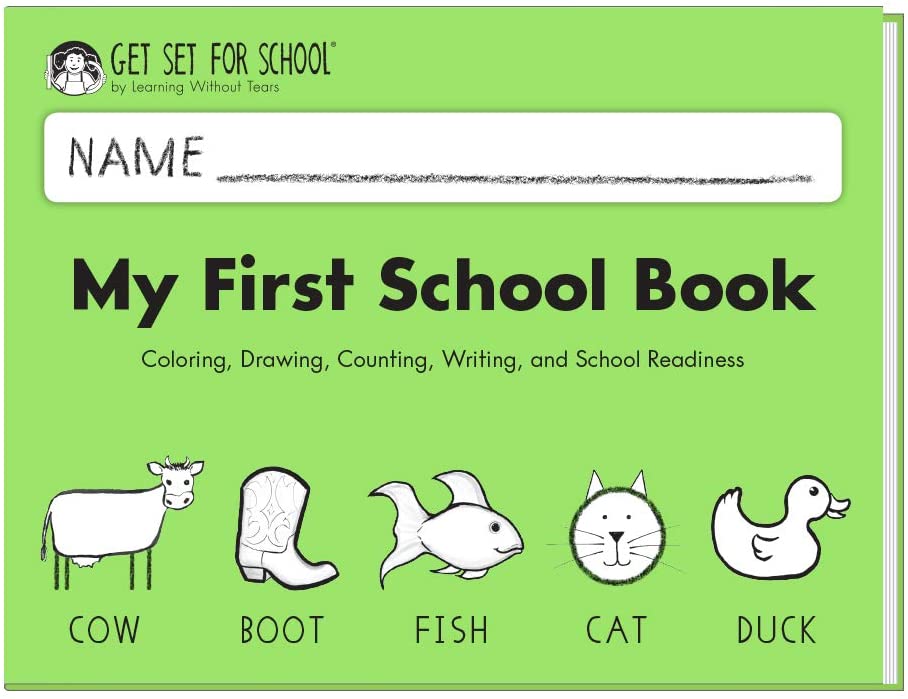
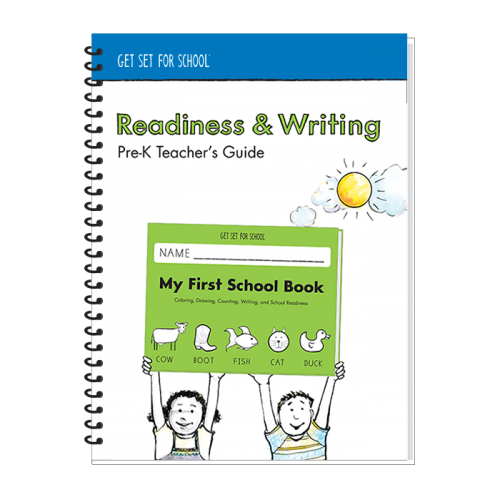
You start with My First School Book which teaches capital letters and numbers. Sample here. Available from Sensational Kids and Thinking Toys.
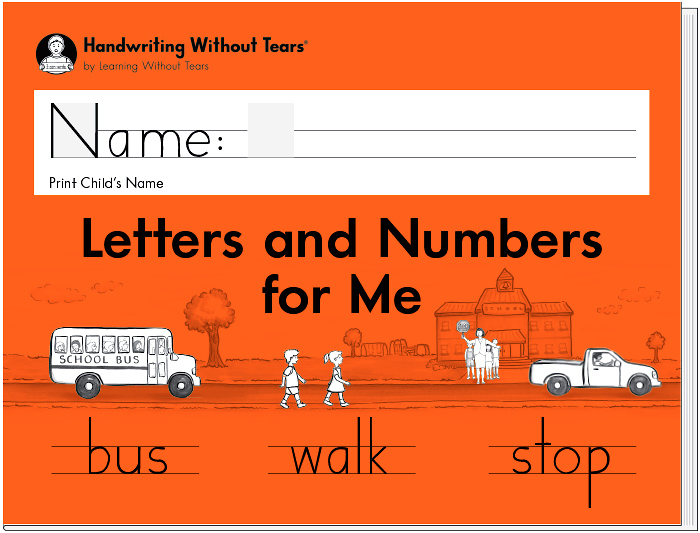
The next book is Letters and Numbers for Me which reviews the capital letters before working through the lowercase letters and writing words. (Sensational Kids, Thinking Toys)
My Printing Book is next, practising upper case, lowercase letters, words and sentences, on narrower lines. Most pages still have pictures to colour in. For both my children I paused partway through this book as it was using a lot of sight words and I used a phonics reading program – All About Reading. For a while, I wrote out words and short sentences from their readers for them to copy using the line width from this book because I wanted them to be able to read phonetically what they were writing. (Sensational Kids, Thinking Toys)
Then comes Printing Power, which includes a variety of sentences and a little bit about punctuation. (Sensational Kids, Thinking Toys)
Then we moved to the blank lined notebooks, called Writing Journals by Handwriting Without Tears, and started Charlotte Mason copywork, mostly using Cottage Press Primers (Amazon UK Teacher guide, Amazon UK Student book). The notebooks come in different line widths, so you pick the width that is the right for your child.
The wooden pieces are a little expensive, but you could make some out of thick cardboard if you prefer. My children enjoyed the songs involving selecting and tapping their wooden pieces before creating the letters. The official set has a soft foam blue mat with a smiley face in the top right to remind them where to start their letters. You will need some sort of A4 page with a smiley face. (Mat at Sensational Kids, Wooden pieces at Thinking Toys, Mat at Thinking Toys) More information on using the wooden pieces is here.
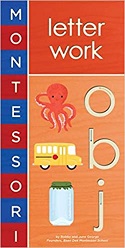
I don’t own Montessori sandpaper letter cards, but I do have these inexpensive, small books for lowercase letters (Amazon UK, Book Depo) and numbers (Amazon UK, Book Depo). Given the wooden pieces are only for capitals, I was glad to have these, bringing in this tactile sense.
Next, you need little chalkboard, some little pieces of chalk and a square of sponge. Mine was cut from the washing sponge. The chalkboard is about A5 (half of A4 size) if you are looking in the Euro store. (Sensational Kids, Thinking Toys)
I assume any playdough would work for making letters. We used to make our own. The base plate for creating the playdough letters on is about A5 size. (Thinking Toys)
The CD with the Rock, Rap, Tap & Learn CD really adds to the fun. I want my children to enjoy learning, so this was worth it to me. (Sensational Kids, Thinking Toys)
The teacher guide for the first level is really helpful and worth having. If you have the teacher guide for the first level and you are home educating, I feel the workbooks are enough for the subsequent levels. You are working one on one with your child, not trying to keep the attention of a classroom.
Some sample pages from the teacher’s guide are available here. (Sensational Kids, Thinking Toys)
Details of how all the capital letters and numbers are formed are here.
Handwriting Without Tears has a significant number of materials. Some overlap and having seen them in person, I feel many would be overkill in a home. The above is all you need in normal circumstances. If your child has additional needs you will need to consider those.
I would not recommend the cursive curriculum from Handwriting Without Tears for use in Ireland, because some of the letters are different from how we write in Ireland. I will discuss cursive in a future post.